Imagine a world where you no longer have to spend hours crafting the perfect social media post for each platform. What if you could automate the entire process, from content creation to posting? Well, that's exactly what we're diving into today! In this guide, I will walk you through how to set up a powerful AI automation that generates and publishes content to X (formerly Twitter), LinkedIn, Instagram, and Facebook—all without you lifting a finger.
Why Use AI Automation for Social Media?
The landscape of social media is constantly evolving, and keeping up with the demands of daily posting can be overwhelming. With AI automation, you can save time, reduce stress, and maintain a consistent presence across multiple platforms. The best part? You don't need to be a tech wizard to set it up!
Getting Started: Your Free Automation Document
Before we get into the nitty-gritty, I have a free document available for you to download. This document contains the entire automation setup and prompts that I use, allowing you to copy and paste without needing to start from scratch. You don’t even need to sign up with your email!
Download the document here: Your connected workspace for wiki, docs & projects | Notion
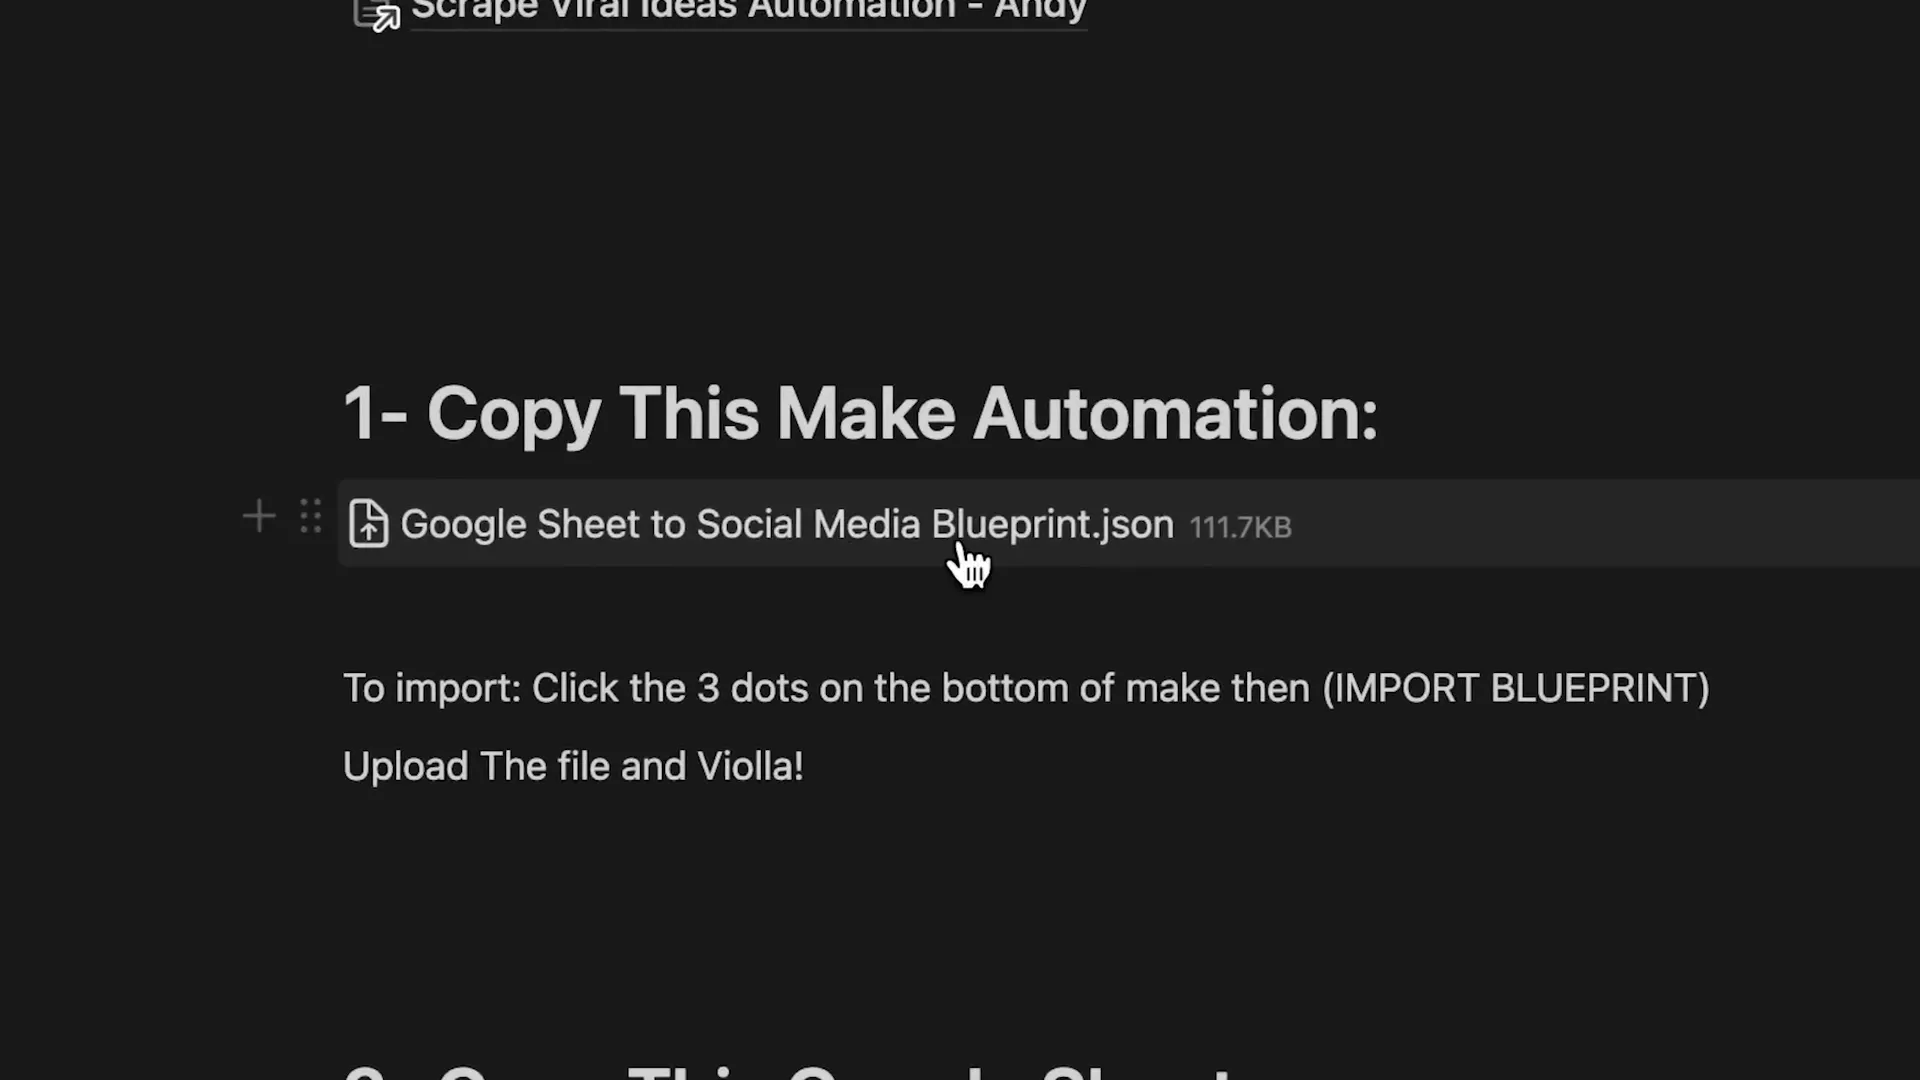
Step 1: Copy My Automation
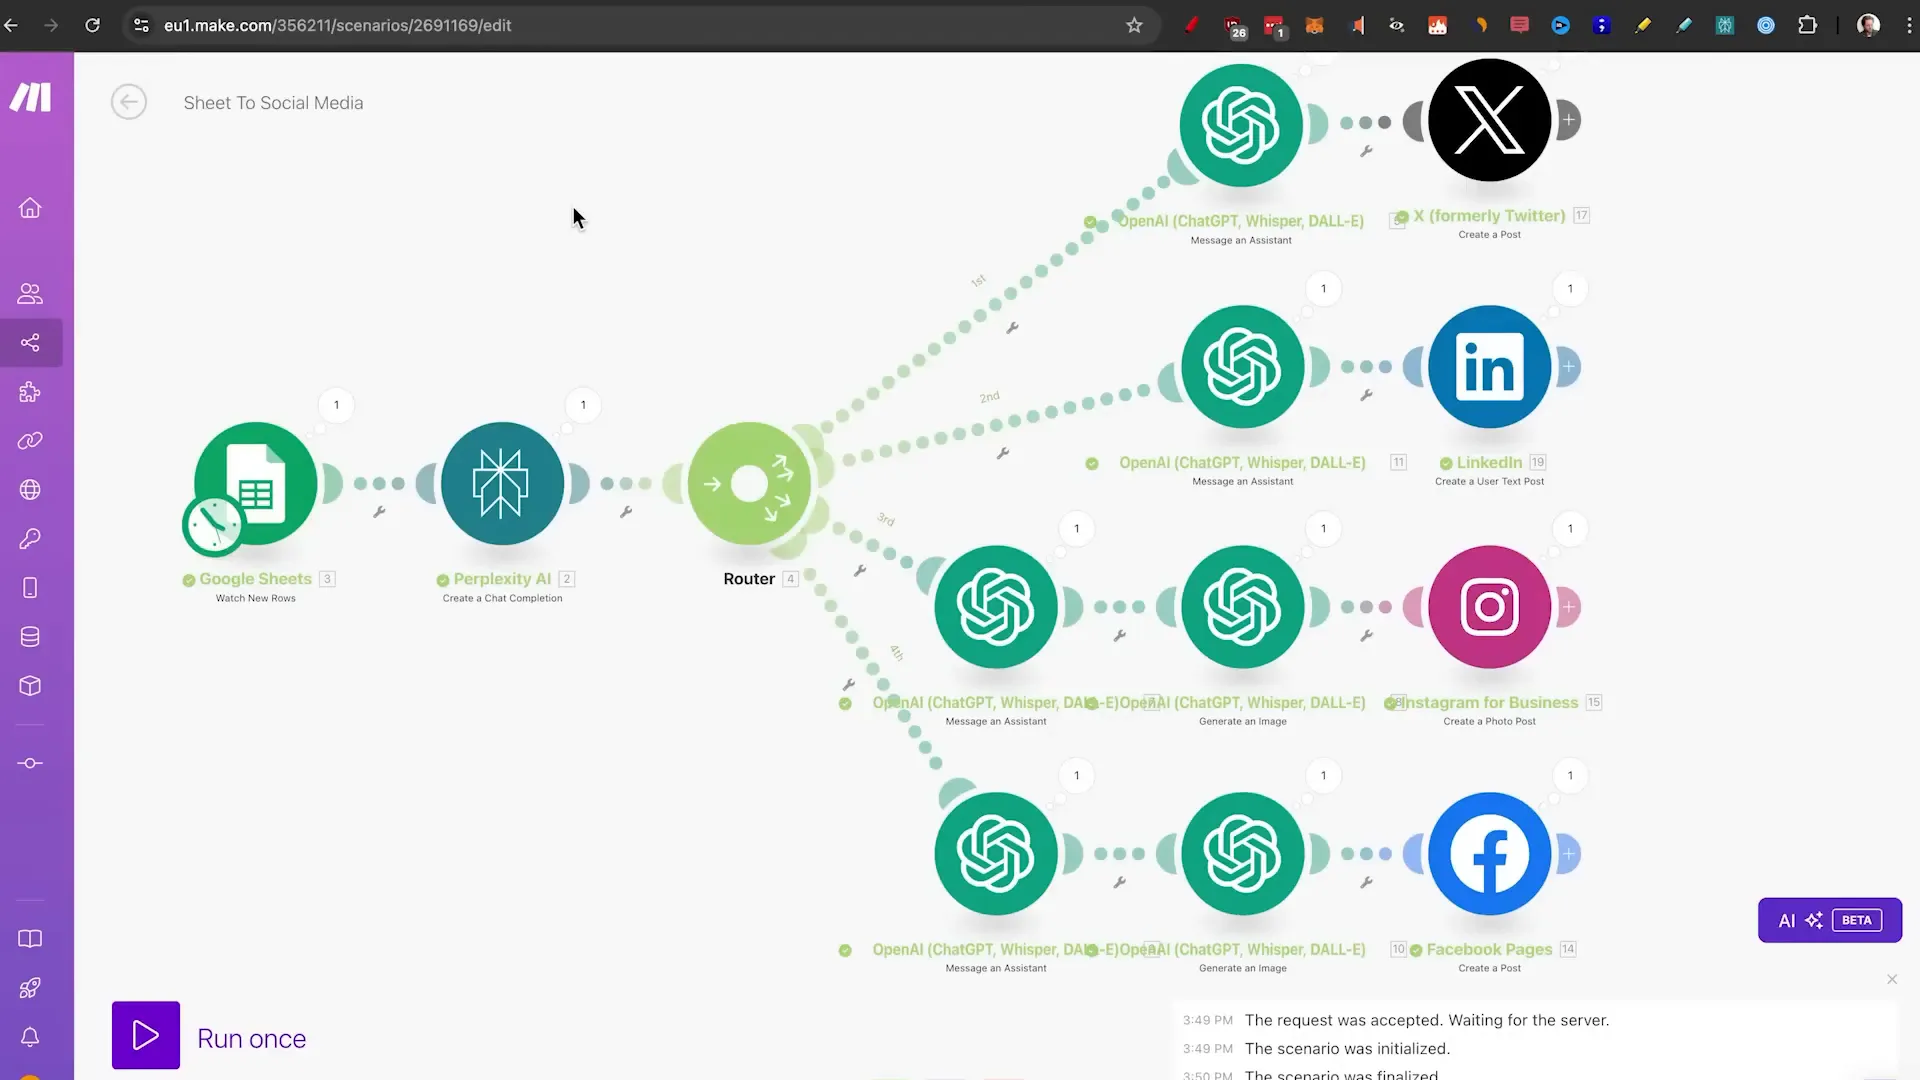
To begin, you’ll want to copy the automation. Go to the link provided in the document, download the Google Sheet to social media blueprint, and make a new automation in Make.com. Just click on the three dots in the bottom corner, select “Import blueprint”, choose the JSON file you just downloaded, and click “Save”. Voilà! Your automation is set up without any hassle!
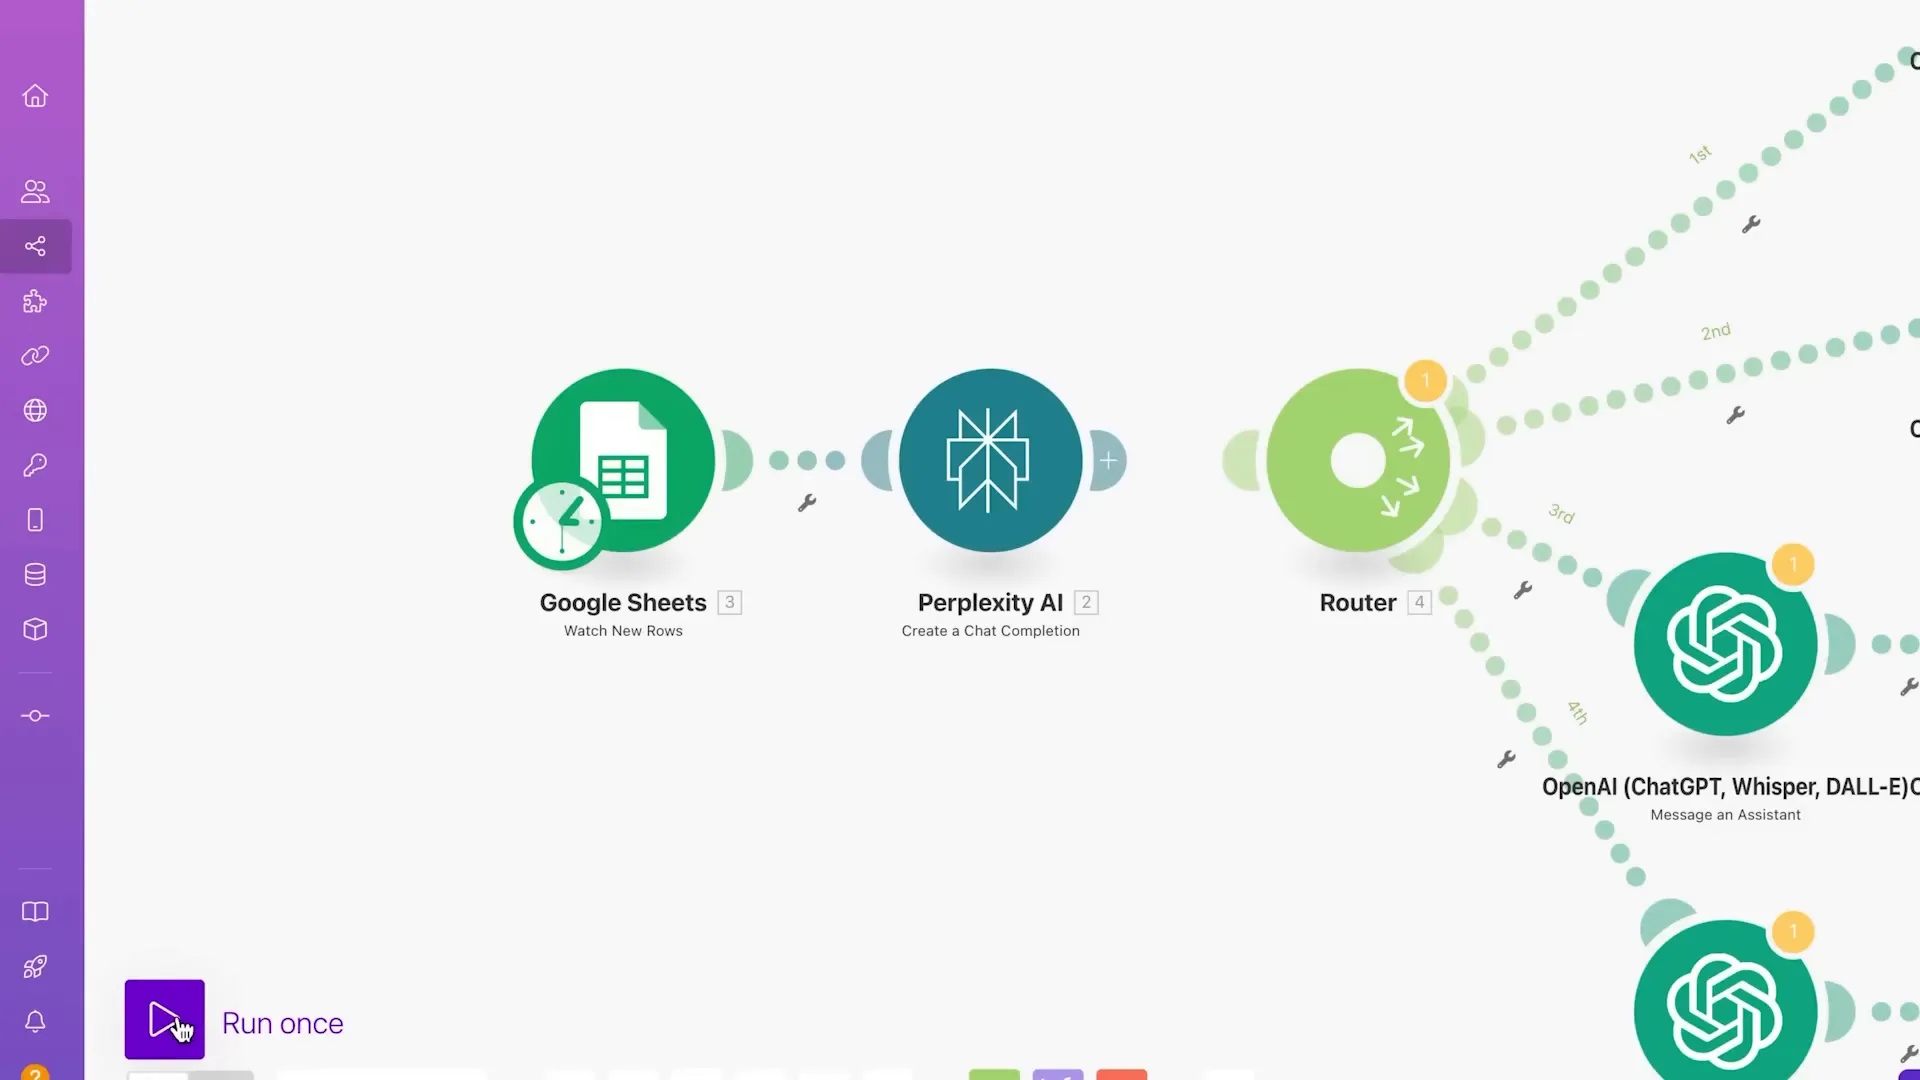
Step 2: Setup Google Sheets and Perplexity
Next, we need to set up Google Sheets and Perplexity. Google Sheets will act as the repository for your articles, while Perplexity will help rewrite those articles into engaging summaries. Start by opening the Google Sheet you just imported and make a copy for yourself.
Now, find an article link that you want to create social media posts from. For instance, I found an article about a new robo-taxi service that could make for a funny post. Copy that link, and paste it into the designated cell in your Google Sheet.
Next, we need to configure Perplexity:
- Go to the API settings and purchase a few credits (I recommend starting with $5).
- Generate your API key and copy it.
- Create a new connection in Make.com for Perplexity and paste the API key there.
Once that's done, you'll be ready to summarize your articles. Click on “Run once” to see how everything is working.
Step 3: Prompt ChatGPT for Different Social Media Platforms
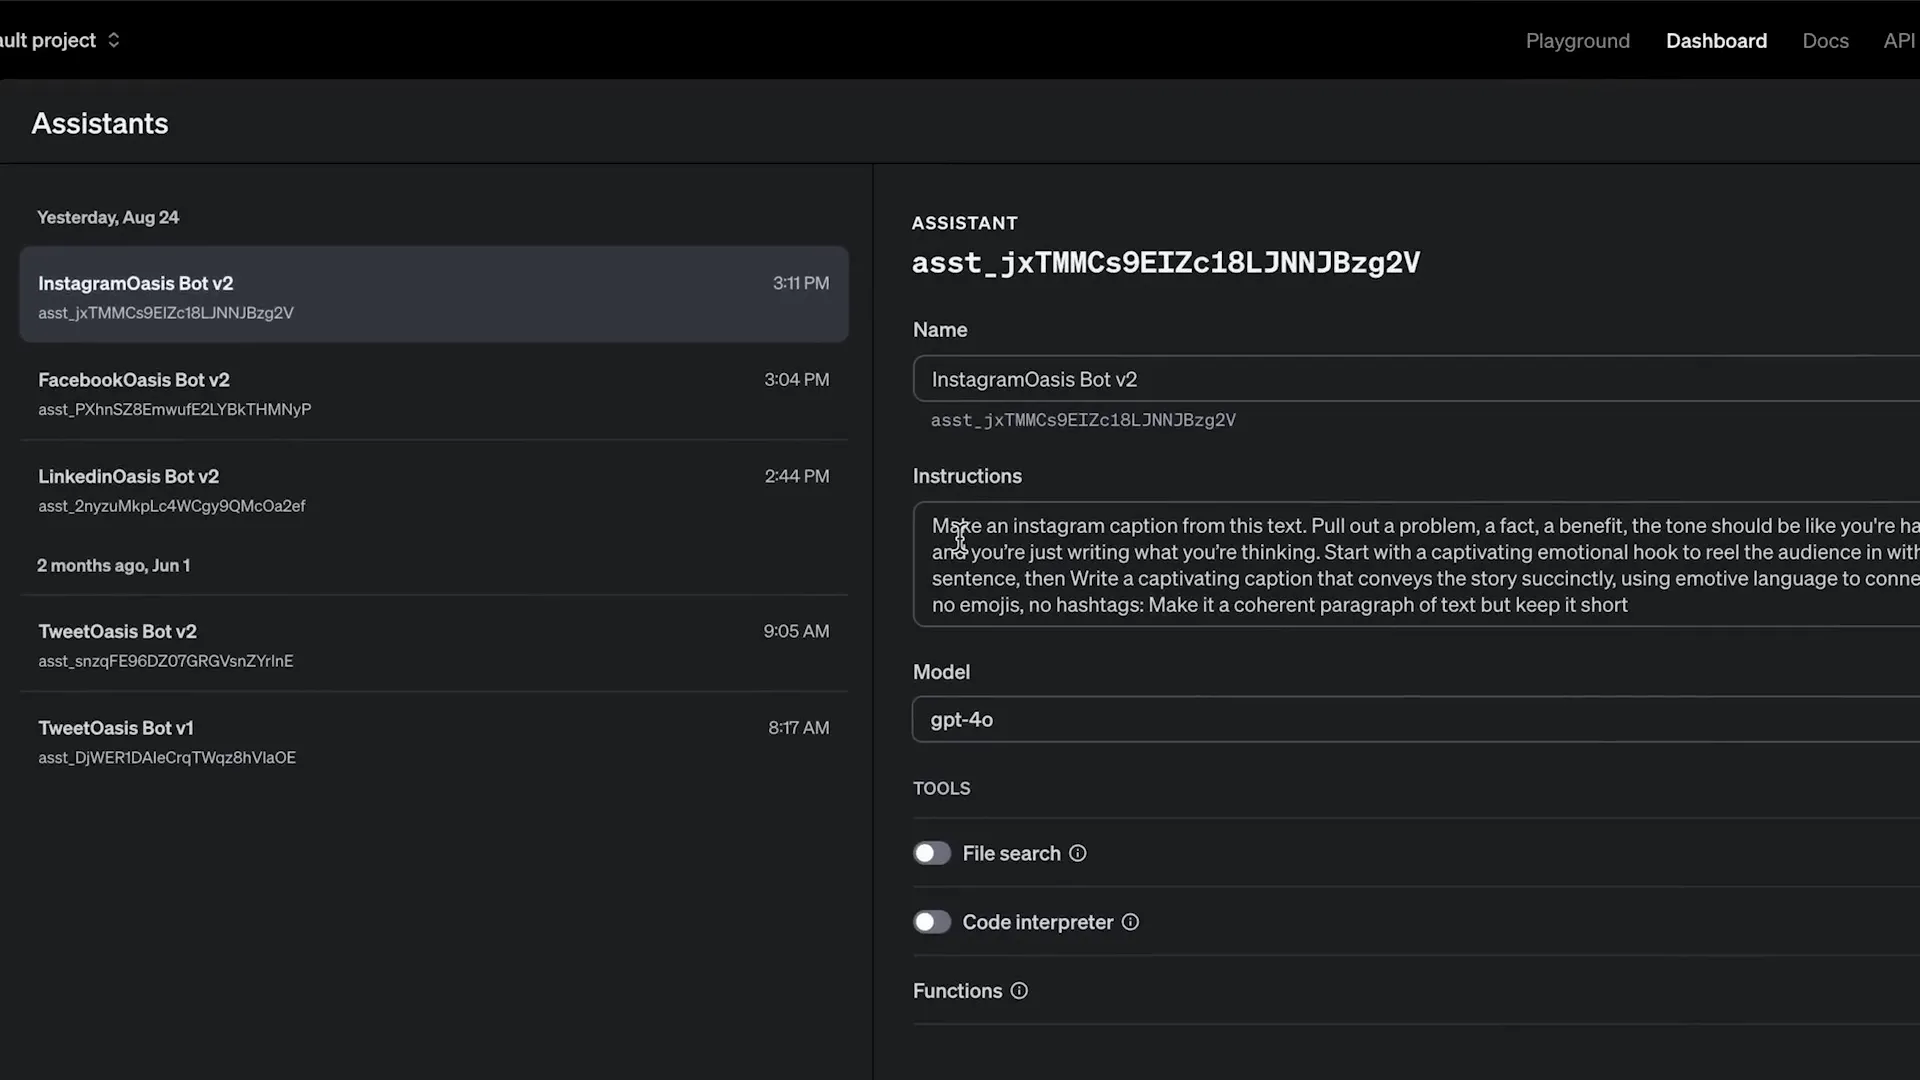
Now, let’s set up the ChatGPT prompts for your various social media platforms. Each platform has its own tone and audience, so we’ll tailor the prompts accordingly. Start by visiting the ChatGPT Assistant Playground and create separate bots for Instagram, Facebook, LinkedIn, and Twitter.
For each bot, you’ll want to give it a name and specific instructions on how to generate the content. For instance, for Twitter, you might instruct it to create casual, thought-like posts without emojis or hashtags. This subtlety can make a huge difference in engagement!
Common Mistakes to Avoid
One common mistake that many people make is using long prompts. Remember, shorter prompts are often more effective. Long prompts can confuse the AI, leading to irrelevant outputs. As a general rule, keep your prompts concise and to the point.
For example, instead of asking ChatGPT to create a long-form post for LinkedIn, simply ask it to summarize the article and include a question at the end to encourage engagement.
Step 4: Connect Everything in Make.com
Now that you have all your components set up, it’s time to connect everything in Make.com. Open the ChatGPT node and add your connection, using your API key. For each platform, select the appropriate bot you created earlier. This will allow you to pull in the content generated by ChatGPT.
After setting up the connections, you’ll need to add the social media platforms you want to post to. For example, for LinkedIn, you’ll add the post text and any relevant images generated from your prompts.
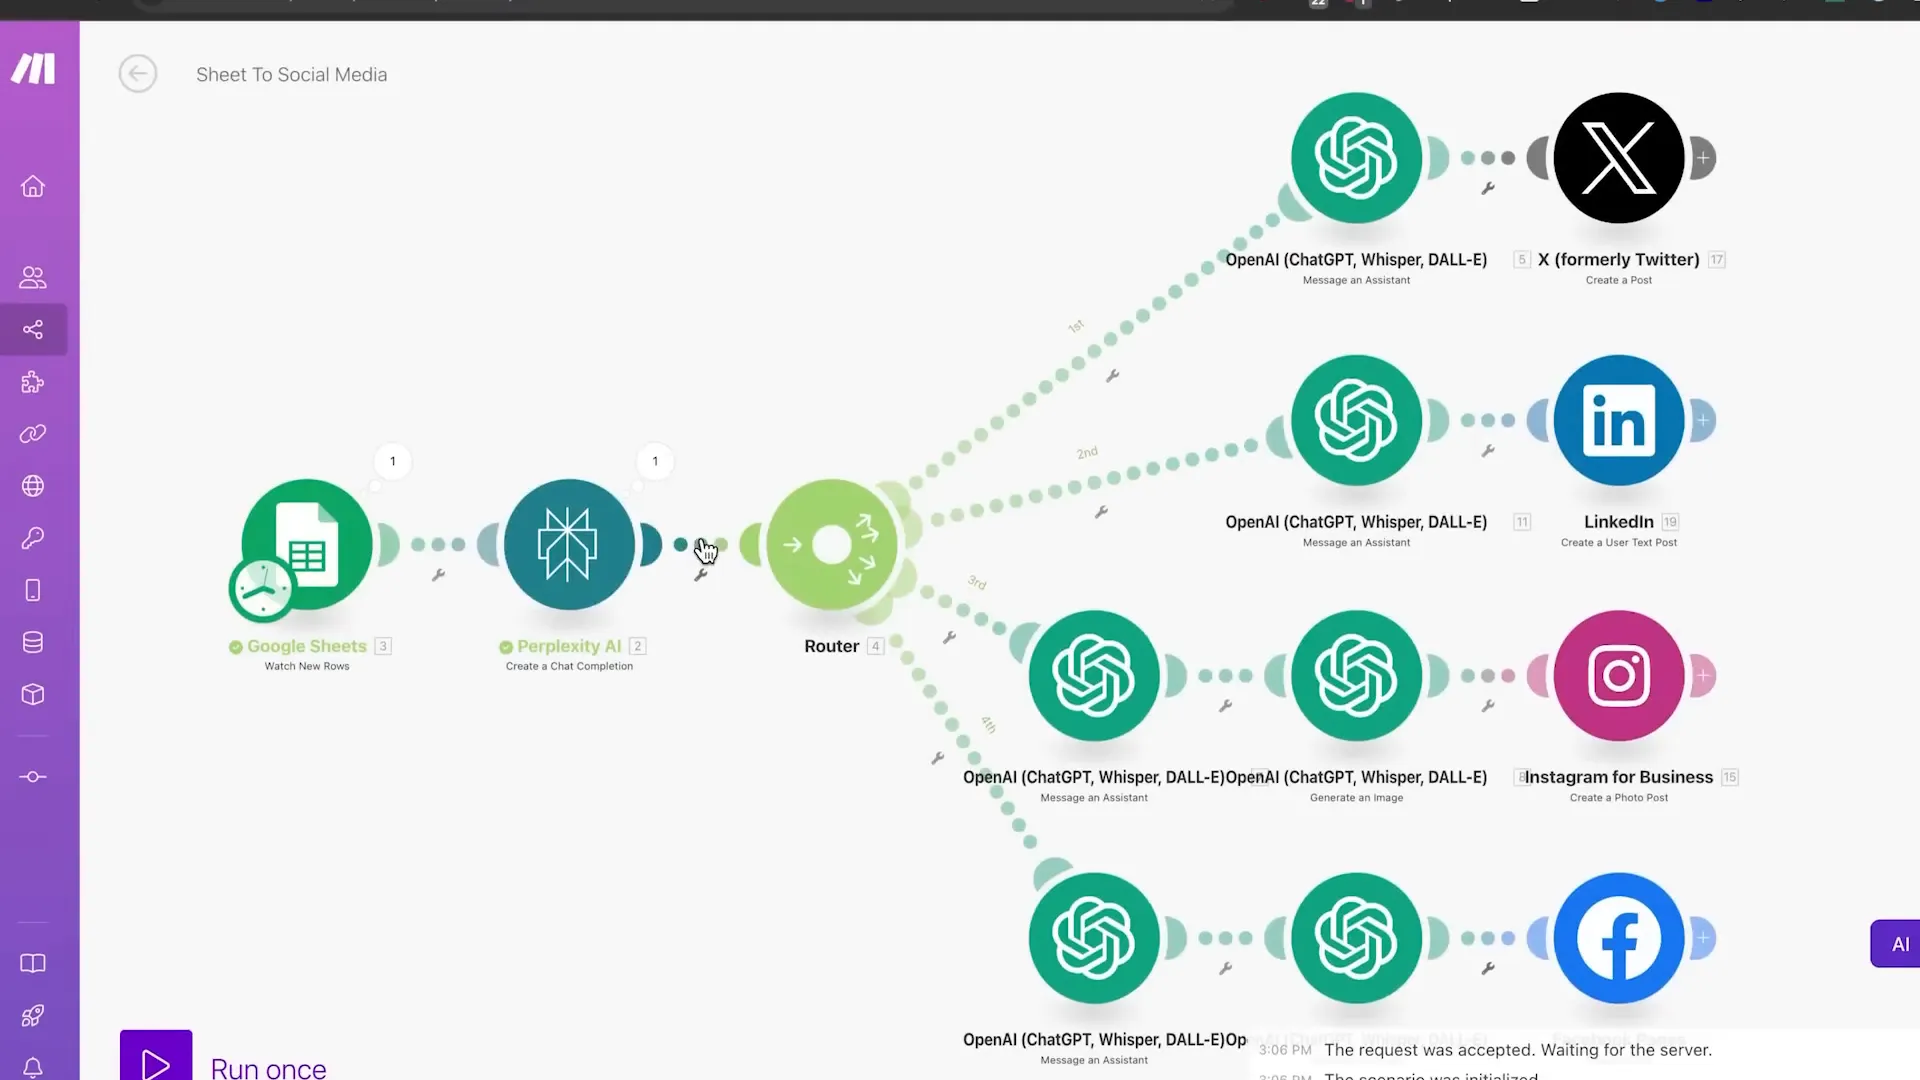
Publishing to All Social Media
Once everything is connected, you can finally publish your content! Simply click “Run once” in Make.com, and watch as your automation takes care of posting to all your social media platforms simultaneously.
For instance, when I tested it with an article about AI in salmon farms, the automation went through all the steps: summarizing the article, generating posts, and publishing them on X, LinkedIn, Instagram, and Facebook.
Conclusion: Embrace the Future of Automation
AI automation for social media is not just a luxury; it’s becoming a necessity in our fast-paced digital world. By following these steps, you can streamline your content creation process and free up valuable time to focus on other aspects of your business.
If you want to stay updated on AI automation and receive personal tech support, consider joining my community. You can find the link in the description below.
Happy automating!

